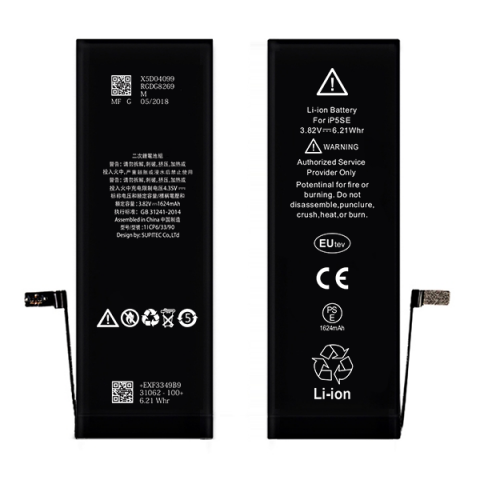
Pin cho iphone SE
Giá bán lẻ đề xuất: 
350.000 VNĐ

Pin thay thế cho Model iphone SE

- Được thiết kế chuẩn dung lượng Iphone SE

- Áp dụng công nghệ chuẩn pin Li-on Polyme.

- Chuẩn CE Châu Âu, trọng lượng pin nhẹ.

- Chống cháy nổ, an toàn tuyệt đối.

- Dung lượng: 1624 mAh

- Nguyên liệu: Li-ion polymer

- Vòng đời sản phẩm :Trên 1000 lần sạc

Bảo hành 12 tháng lỗi 1 đổi 1

Hướng dẫn thay thế :
 

Before you proceed, discharge your iPhone battery below 25%. A charged lithium-ion battery can catch fire and/or explode if accidentally punctured.


In the following steps you will be pulling the display up out of the phone body. The display is composed of a glass screen and a plastic bezel with metal clips.Regardless of the tool you use, you need to be sure you pull up the entire display.


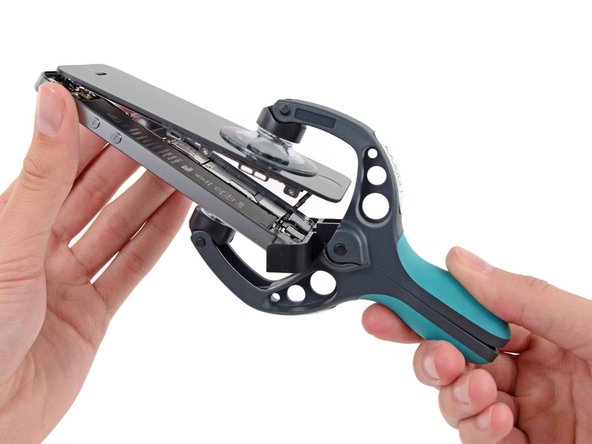
The next two steps demonstrate using the iSclack, a great tool for safely opening the iPhone that we recommend for anyone doing more than one repair. If you aren't using the iSclack, skip the next two steps.Close the handle on the iSclack, opening the suction-cup jaws.Place the bottom of your iPhone in between the suction cups, against the plastic depth gauge.


Hold onto your iPhone securely and close the handle of the iSclack to separate the suction cups, pulling the front panel up from the rear case.The iSclack is designed to safely open your iPhone just enough to separate the pieces, but not enough to damage the home button cable.


If you don't have an iSclack, use a single suction cup to lift the front panel:


The front panel is attached with clips, and there are several ribbon cables connecting it to the rest of the phone. Your goal here is to release the clips and open the phone only enough to disconnect the cables. Go slowly and carefully to avoid damage.

Do not try to completely remove the front panel assembly from the rear case, as there are several delicate ribbon cables connecting them.Pull the plastic nub to release the vacuum seal on the suction cup.


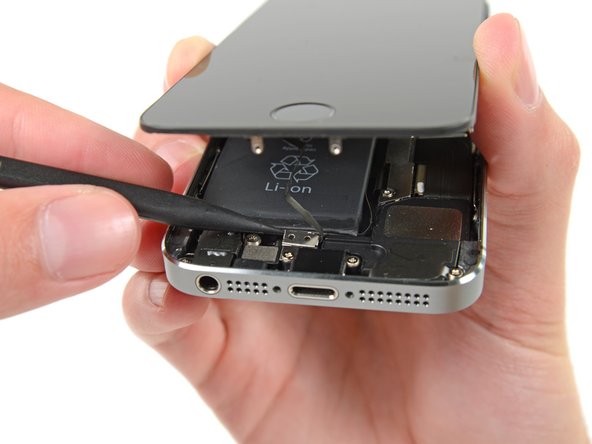
Open the phone just enough to reveal the metal bracket covering the home button cable.Do not open the phone too far or you risk damaging the home button cable, or the socket it plugs into. Keep the cable loose—if it is stretched taut, that's too far.Only the phone's original home button assembly will be capable of using the Touch ID functionality. If you rip the cable, installing a new home button will only restore ordinary home button functions, not the Touch ID features.


During reassembly, you will need to reinstall the Touch ID cable bracket. The top of the bracket needs to slide between the battery and Touch ID cable connector, in front of the metal tab. The bottom must latch down over the connector.


Use the flat end of a spudger to snap the front portion of the Touch ID cable bracket down over the cable connector.If the bracket does not snap down flush, you may need to remove the bracket and slide it over the cable connector again for a better fit.

Be sure you're separating the cable connector from its socket, and not prying the entire socket up. The socket is on its own glued-down cable that can be pried up if you aren't careful.

Once the connector has been released, pull the home button end of the assembly away from the rear case, using the top of the phone as a hinge.Open the display to about a 90º angle, and lean it against something to keep it propped up while you're working on the phone.Add a rubber band to keep the display securely in place while you work. This prevents undue strain on the display cables.


Remove the two 1.6 mm Phillips #000 screws securing the metal battery connector bracket to the logic board.


Remove the metal battery connector bracket from the iPhone.


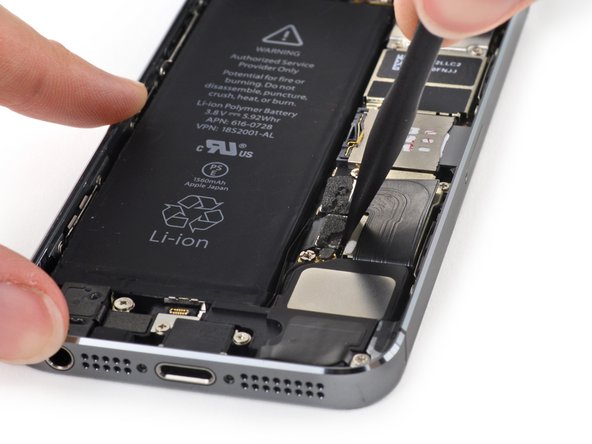
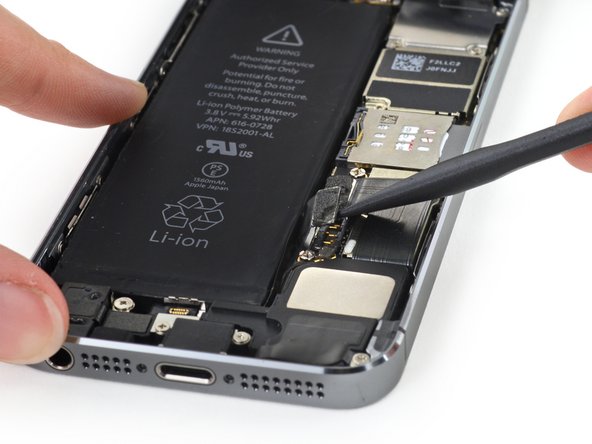
Use the flat end of a spudger to gently pry the battery connector up from its socket on the logic board.


Remove the following screws securing the front panel assembly cable bracket to the logic board:


Remove the front panel assembly cable bracket from the logic board.


Use a spudger or a fingernail to disconnect the front-facing camera and sensor cable.Use a spudger or a fingernail to disconnect the front-facing camera and sensor cable.


Make sure the battery is disconnected before you disconnect or reconnect the cable in this step.


Finally, disconnect the digitizer cable connector.Finally, disconnect the digitizer cable connector.


Remove the front panel assembly from the rear case.


Run the tip of a spudger between the battery and the headphone jack to unfold the battery adhesive tab.Important: Apply heat to the bottom of the iPhone case using an iOpener or similar heating pad to soften up the battery adhesive strips and make them more flexible, otherwise they will probably break when you pull on them.


Pull the battery adhesive tab away from the phone.Cut the black battery adhesive tab between the two white adhesive strips, separating them.Cut the black battery adhesive tab between the two white adhesive strips, separating them.


Try to keep the strips flat and unwrinkled during this procedure; wrinkled strips will stick together and break instead of pulling out cleanly.Pull steadily, maintaining constant tension on the strip as it slips out from between the battery and the rear case. For best results, pull the strip at a 60º angle or less.

Repeat for the second strip.If you removed both strips successfully, skip the next two steps.


Pull the battery out of the rear case.

*
*
1 + 1 =
Tính các phép tính đơn giản này và nhập kết quả vào. Ví dụ: cho 1+3, hãy nhập 4.